INSTALL
How to install a flat travelling cable for a lift camera
The sequence lift companies follow, written for the CCTV installer who is doing it for the first time — with the lift company present.
Shaft work is the lift company's domain: their technician controls the car, the power and the safety procedure. The CCTV installer supplies the cable, the camera and the terminations. This guide is the sequence; the safety steps belong to the lift company and are not optional.
Before you start
- Agree the fixing point with the lift technician — normally the bracket that carries the lift's own travelling cable, near the middle of the shaft.
- Measure the travel (top floor to bottom floor) and work out cable length with the calculator. Order coil pairs.
- Bring RJ45 plugs rated for stranded conductors, cushioned clamps, and a PoE tester.
Step by step
Typical time on site: about 3 hours for one lift, two people.
- Isolate and position the carThe lift technician puts the lift on inspection, parks the car where the fixing bracket is reachable from the car top, and confirms the shaft is safe to enter.
- Fix the cable at the bracketClamp the flat cable at the travelling-cable bracket with a cushioned clamp, flat face against the bracket. On CC-8261G-90 terminate the two GI ropes with rope clamps so the ropes take the load.
- Run to the car topLay the cable alongside the lift's travelling cable, same side, same plane, with the loop hanging free. Do not tape it to the power travelling cable and keep it clear of the counterweight path.
- Set the loopWith the car at the bottom floor the loop should hang freely without touching the pit floor; with the car at the top the cable should not be under tension. Adjust at the bracket, not at the car.
- Secure at the car topClamp the cable to the car-top frame with a cushioned clamp, leaving a short service loop before it enters the car. Never a cable tie pulled tight — it cuts the jacket over time.
- TerminateCrimp a stranded-rated RJ45 at the camera end. At the junction box, terminate on a keystone and join to the fixed round CAT6 that runs to the NVR. Keep every joint out of the moving loop.
- Test with the car movingRun the lift top to bottom several times while watching the camera stream and the PoE voltage at the camera. A steady picture through the full travel is the acceptance test.
- Record itNote the part code, cable length, fixing point and test result on the lift's maintenance card. The next installer will thank you.
TOOLS
- PoE tester / cable certifier
- Crimp tool with stranded-rated RJ45 plugs
- Cushioned cable clamps
- Rope clamps (GI rope version)
MATERIALS
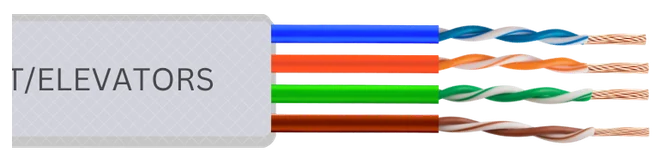
- Channeltech CAT6 Flat 4 Pair, CC-8251G-90 (or CC-8261G-90 with GI rope)
- Keystone / coupler for the junction box
Common mistakes
- Coiling spare cable on the car top: the coil flexes every trip and fails. Cut to length and leave only a short service loop.
- Joints in the loop: couplers, junction boxes or splices inside the moving section fail first. Joints live in the fixed section only.
- Solid-core plugs on stranded cable: they bite one strand and loosen with vibration. Use stranded-rated plugs.
- Tight cable ties: they cut through a soft FRLS jacket in months. Use cushioned clamps.
THE CABLE THIS GUIDE IS ABOUT